
Bike Fit | how to fix cycling with too much weight on the hands

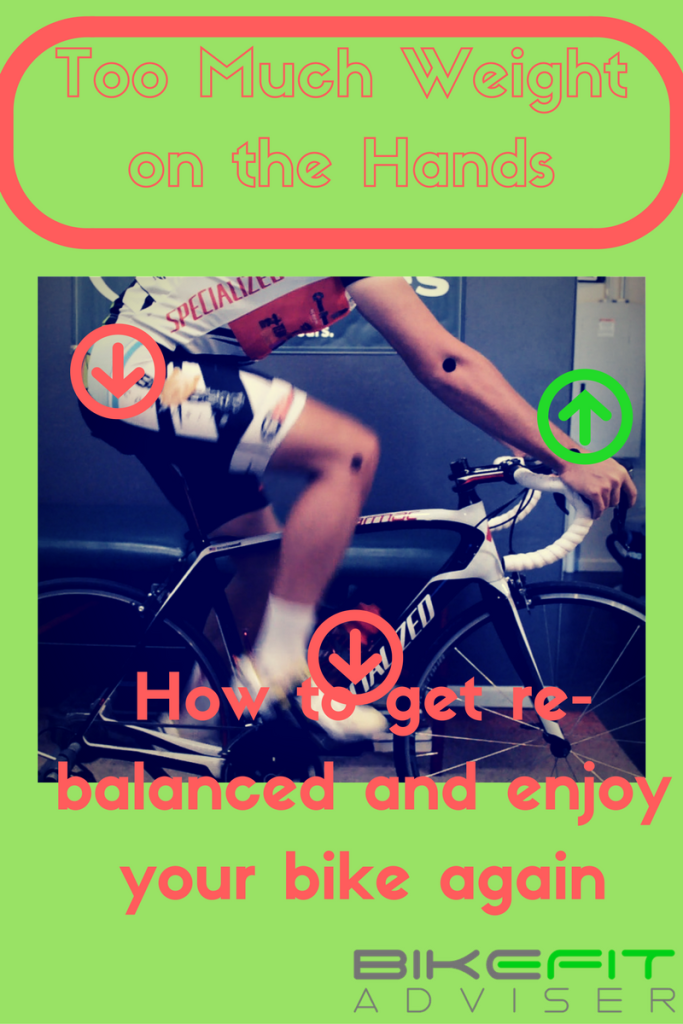
Cycling with too much weight on the hands can be miserable. In a past video I described a quick test that can be done on a stationary trainer in order to tell how you are balanced on your bike and specifically whether you have too much weight on your hands:
I recently had a reader write to me and ask where he should start after failing this test miserably?
In bike fitting, there is no single bike change or exercise that can reliably fix this problem -- there's simply too many possible paths to take depending on a complete off-the-bike physical assessment and on-the-bike analysis. But there are a few principles that can be followed to get a rider closer to a solution.
In a nut shell though, what needs to be addressed is the balance of weight between the feet and the pelvis. When the rider fails the test and falls forward it's a symptom of relying too much on the hands for support on the bike. This can happen with or without hand pain or numbness. We have to make sure that the feet and hips are bearing their share of weight.
- One of the main determinants here is proper saddle height -- being too high or too low by even small amounts will cause a problem. Too high and the knee, ankle and foot will be reaching which makes it difficult to put the full amount of weight on the foot. Too low and the knee can't straighten enough to take some of the weight from the hips.
- Buried in this proper saddle height idea is proper ankle mechanics -- making sure that we don't have too much or too little ankle motion will play a large role. For example, a rider can have a seemingly normal knee extension angle at the bottom of the pedal stroke -- let's say a dynamically measured 40 degrees from full extension, which is in the "normal" range -- but if they're plantar-flexing their ankle and pointing their toes 35-40 degrees relative to horizontal, this can lead to instability at the feet. A segment that is unstable won't be "trusted" by the body and we won't be placing our weight solidly through that joint.
A simple way to make sure your ankles are appropriately stable and by extension that you have enough weight through your feet is to make sure that you can push through your big toe as you pedal through the power phase. During the down stroke, try to accentuate the force of the big toe on the bottom of your shoe. In this scenario you should notice the greatest amount of pressure along the big toe and the metatarsal behind it -- collectively we call this the first ray. If you feel like you can't finish your power phase through the big toe then a cleat change may be in order (read on). If the area of greatest pressure in the foot is not through the big toe -- perhaps on the outside of the foot, like many riders experience, or in the middle of the foot somewhere, then further work needs to be done to get the force to move medially. This might include changes to the stance width on your pedals, canting of the cleat, an insert to properly align the heel and rear foot, or a change in saddle height. Particularly if you have the pressure on the outside of the foot, you might try a varus wedge (I would begin with 2) under the cleat (fat part of the wedge should go to the inside). While this is rarely an "A + B = C" scenario, this is a reasonably safe and relatively inexpensive method that works for some people.
The next factor is getting the proper saddle fore/aft position -- what I like to call the "Pelvic X" position -- or having the pelvis behind the feet the proper amount. This is where the idea of KOPS came from -- which stands for "knee over pedal spindle". KOPS is an antiquated bike fitting metric where the rider holds their foot in the 3 o'clock position and a plumb line is dropped from the front of the kneecap (or the front of the patellar tendon, or the tibial plateau; starting to get an idea of why this is antiquated? Never has there been a consensus on which measurement point is "correct".) and we see where the plumb line falls relative to the pedal axle. According to this "rule" the line should fall directly through the center of the axle. I could go on for pages as to why this is not the case, but let's suffice it to say that it's not necessary to have the knee fall directly over the pedal.
I'm less concerned about where the knee is relative to the foot/pedal, and more concerned with the hips and pelvis. With the hips far enough behind the feet we take advantage of the full benefit of Newton's Third Law of Motion. Put simply, because our feet are below and in front of our hips, as we push on the pedals, they are pushing back an equal and opposite amount against us which provides an unweighting on the saddle as well as a force directed backwards on the pelvis which keeps it stable on the seat.
What's the right amount of distance behind the hips? The hips have to be far enough back that they'll independently be able to remain in place even as the amount of weight on our hands fluctuates. This will depend on all the typical things -- the rider's strength (trunk/core or otherwise), flexibility, morphology, riding style, movement restrictions, etc. It's also going to depend on the type of bike (i.e. standard road bike, triathlon bike, mountain, cyclocross....you get the point).
Only when the feet and hipos are addressed can we look at handlebar placement. For a road bike, we have a small range of where it's possible to locate our handlebars -- we need to find the point in this range that is the most aggressive that allows the pelvis to tilt forward just enough were we're still maintaining the positive balance test.
So it works from the feet up -- if we have weight going well through our feet, our pelvis is behind our feet enough and can tip forward just enough to allow our hands to rest comfortably on the bars, then we'll have good balance, and a comfortable fit.
But I know this is a lot of theoretical information and it sounds deceptively simple. It is not simple. But what could you do in real life to help remedy the situation? This is by no means a complete prescription or a substitute for a bike fit, but based on what I see every day in my bike fitting practice, this is what I would try:
1. err on the side of having your cleats pulled back on the shoe. They don't have to be slammed all the way back but if you can move them back on the shoe even 5 mm, this can help to increase stability thru the feet. Speedplay pedals create particular problems here, so if you have these then you may need to reach out again and I can tell you how to fix that.
..........with the cleat pulled back, this moves our foot forward -- voila our hips have already moved back relative to our feet!
..........by pulling the cleats back, we've effectively shortened your leg and so you may need to slightly lower your saddle to compensate
2. Make sure your saddle is close to level
3. Take note of your saddle position on the seatpost. Is it clamped in the middle of the rails? Slid forward? Slid back?
If your saddle is slid forward on the rails, you might not have your hips back far enough. Many people have this scenario on their bike because the reach of their bike is too long, and they're trying to make it shorter. Some can improve their balance and overall fit by shortening their stem and sliding the saddle back on the rails. This doesn't shorten the reach of the bike, it maintains it, but it does get the hips behind the pedals a little more and might help with the balance.
A rarer occurrence is the rider who has the saddle slid all the way back on the rails, a long stem on the bike, and they're still trying to sit as far back on the saddle as they can. This is indicative of a bike that's too small -- much more rare in my experience.
Incidentally if you do slide the saddle back on your bike (with or without a stem change), you're still having symptoms of too much weight on your hands, and now your saddle is really uncomfortable, then there's a really good chance you're on the wrong size bike. The reason the saddle hurts now too is you have slid your rear end forward on your saddle, into the narrower middle section, in an attempt to shorten the reach to the bars.
4. Now that we've addressed the feet and the hips slightly, let's re-do the balance test on the bike, but this time have someone stand in front of you, placing their hands on the bars to provide alternate hand positions for you on the bike. What we're using them for is to be able to try slight variations in bar reach and height without having to try a bunch of stems. What you're trying to find is the most aggressive position (the longest and lowest point) that still allows you to, if not completely pass the test, then come pretty close. The reason we don't have to fully pass the test at this point is because your body is likely to make a whole host of adaptations, so we need to err on the side of caution so we don't make too much change.
5. Now you need to do some math (or just make a reasonable guess) as to what length and rise of stem will put you close to this hand position while on the hoods.
If the proposed bar position is so drastic that it would almost not be able to be achieved on any bike then one of two things is going on:
Either you do have some particular movement and postural problems and you need to have a custom bike built (this is usually not the case)
Or we still have work to do with the saddle position -- particularly, it may have to go back a little more. A small aft shift in the saddle can have a dramatic effect on balance to our hands.
Again, this is a fairly simplistic view of how things actually are, but I think many cyclists will see shadows of themselves in the descriptions and problems I've laid out. My hope is that someone struggling with their bike might glean a small pearl from this and at least partially solve their issue. Even small steps forward can make a tremendous difference in how much a rider likes their bike.
So don't give up, make small adjustments and let me know where you get....